

VTEX
This guide provides a step-by-step process to integrate your VTEX store with Ecart Pay, enabling seamless payment processing. Follow the steps below to complete the setup and ensure smooth transactions.
Instructions
🛠️ Ecart Pay Integration Guide for VTEX
- Access Ecart Pay and navigate to the "Integrations" section. Here, you will find all supported e-commerce platforms. Select the VTEX option to initiate the integration setup process.
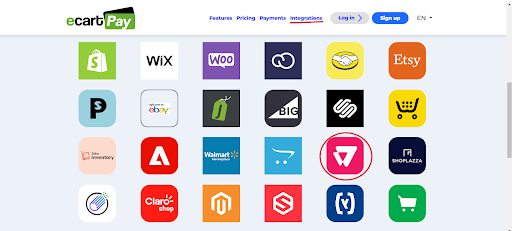
Image 1. E-commerce Platforms
- You will be redirected to the OAuth page to integrate your store. Since you are integrating with VTEX, select that option.
Important Note: VTEX can only be integrated using OAuth.
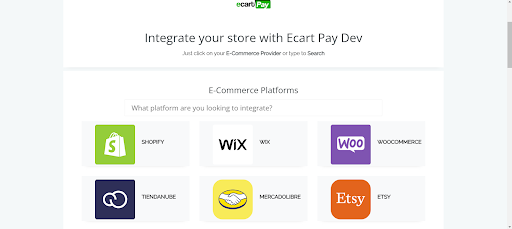
Image 2. OAuth Page
- After selecting VTEX as your e-commerce platform, scroll to the bottom of the page and enter your store's URL.
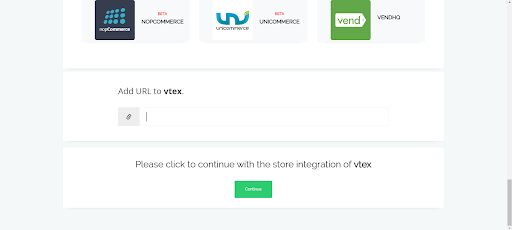
Image 3. Adding an URL to VTEX
- After adding the URL, you will be redirected to your VTEX store's configuration page. Here, you must enter your account name, App Key, and App Token.
Note: You must generate the App Key and App Token in VTEX for the correct installation of Ecart Pay. Click on "Click here" for more details on generating these keys in VTEX.
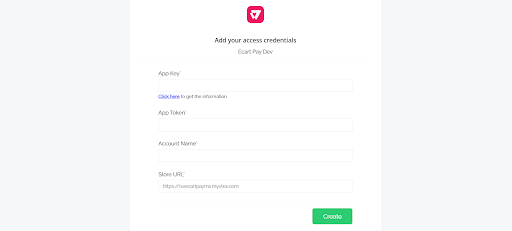
Image 4. Adding Access Credentials
- 4.1. To generate the App Key and App Token in VTEX, go to your store's control panel. At the top, you will see your profile (represented by the first letter of your registered email). Click on Account Settings and then select API Keys.
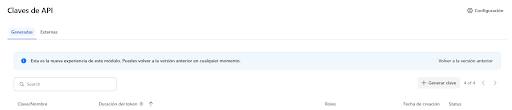
Image 5. Account Settings
- 4.2. Click the "Generate Key" button.
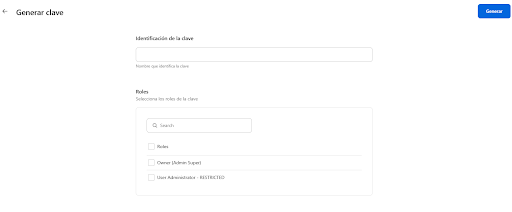
Image 6. Generate Key
- 4.3: Assign a name to your new key and set the permissions. (Recommendation: Use owner - super admin). Click "Generate".
Note: The App Key appears at the top, and the App Token at the bottom. Once this window is closed, the App Key cannot be retrieved unless a new one is generated.
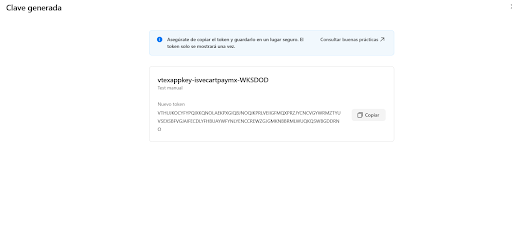
Image 7. New key
- After filling in your VTEX store details, you will be redirected to the Ecart Pay page, where you must either create an account (if you don’t have one) or log in to your existing Ecart Pay account.
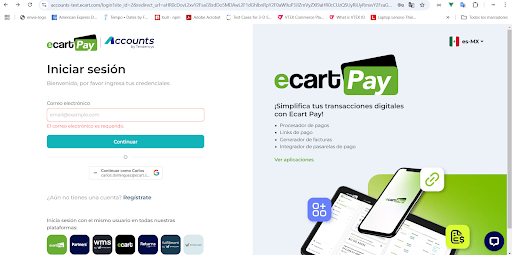
Image 8. Ecart Pay Login Page
- Once logged into your Ecart Pay account, you will be redirected to the integration configuration page. Here, you must confirm linking your Ecart Pay account with your VTEX store. If you want to link a different account, select the "Use another account" option.
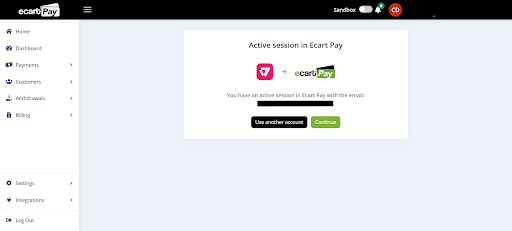
Image 9. Linking Ecart Pay and VITEX
- After linking your Ecart Pay account with your VTEX store, you will be redirected to the VTEX dashboard under the "Payment Provider Configuration" section. Here, you must configure your Ecart Pay account’s private keys (explained in Step 8). The App Key is the Public Key of your Ecart Pay account, and the App Token is the Private Key of your account. You can also select your payment provider's environment. To test payments, enable the Sandbox Mode in Ecart Pay.
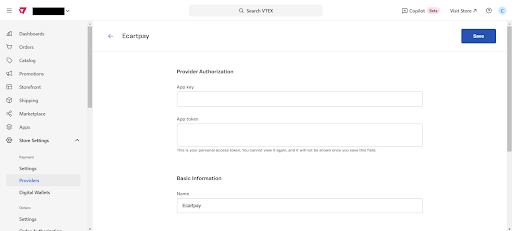
Image 10. Payment Provider on VITEX
- To obtain your credentials for configuring the connector in VTEX, log into your Ecart Pay account and navigate to Integrations/API. Here, you can copy your Public Key and Private Key.
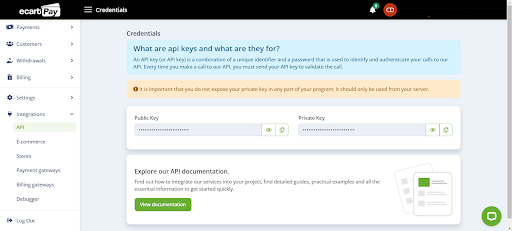
Image 11. API Section with both Public and Private Keys
- After configuring the "Ecart Pay" Payment Provider in VTEX, an alert will notify you that the integration requires the installation of the connector for proper functionality. Click "Install App."
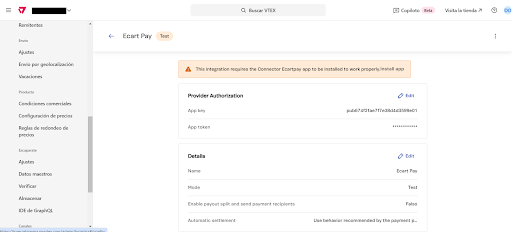
Image 12. Connector Ecart Pay Installation
- Install the Ecart Pay connector to ensure the proper operation of the VTEX Payment Provider.
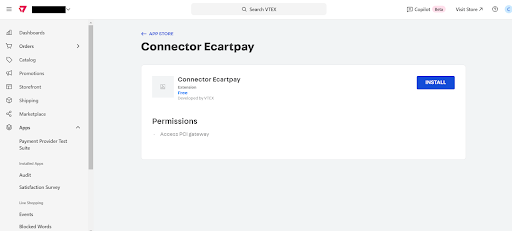
Image 13. Connector Ecart Pay
- After installing the Ecart Pay connector, go to Store Settings > Payment > Settings and add a new payment method for your VTEX store.
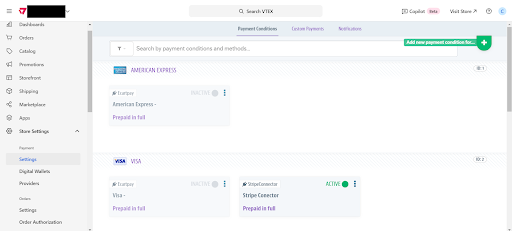
Image 14. Available Payment Methods
- Search for Ecart Pay as a payment method option.
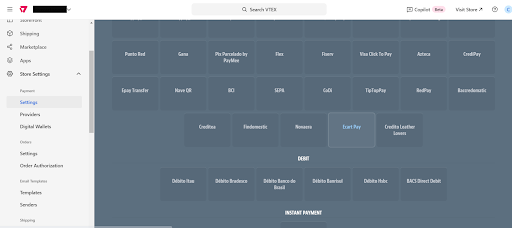
Image 15. Ecart Pay as a Payment Method
- After activating the Ecart Pay payment method and selecting Ecart Pay as the Payment Provider, save the configuration. This configuration should be reflected within 10 minutes in your VTEX store checkout.
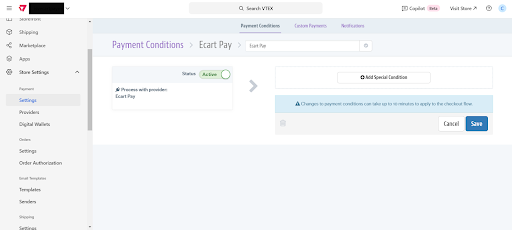
Image 16. Ecart Pay as an Active Provider
- After saving your configuration, the Ecart Pay payment method will appear in your store’s payment options.
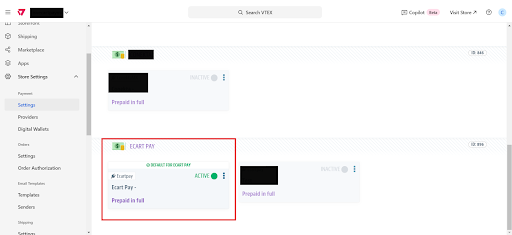
Image 17. Store's Payment Options
- Once the payment method is configured, it will be available in your VTEX store’s checkout. Select Buy Now to process your order with Ecart Pay.
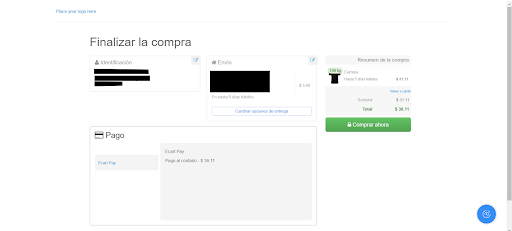
Image 18. VTEX Checkout
- After selecting Buy Now, you will be redirected to the Ecart Pay checkout, where your order details will be displayed. Enter your card details to process the payment via Ecart Pay.
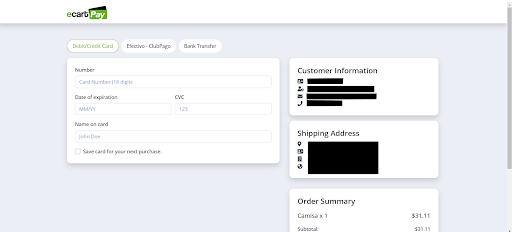
Image 19. Ecart Pay Checkout
- Once the transaction is completed, you will be redirected to your VTEX store, where the order confirmation page will be displayed.
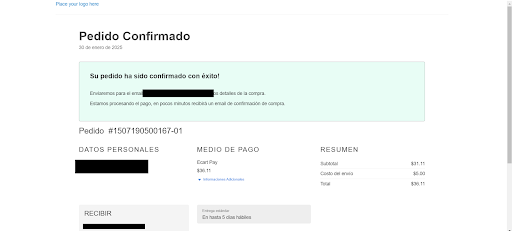
Image 20. Order Confirmation
By following these steps, you will successfully integrate Ecart Pay with your VTEX store, ensuring a smooth and secure payment process for your customers. This integration simplifies order management and enhances the overall shopping experience on your platform.