

Shopify
This guide provides a step-by-step process to integrate your Shopify store with Ecart Pay, enabling seamless payment processing. Follow the steps below to complete the setup and ensure smooth transactions.
Instructions
🛠️ Ecart Pay Integration Guide for Shopify
- To install the Ecart Pay payment app on Shopify, go to the following link: Ecart Pay on Shopify . This will take you to our application page in the Shopify App Store. Click the "Install" button to begin.
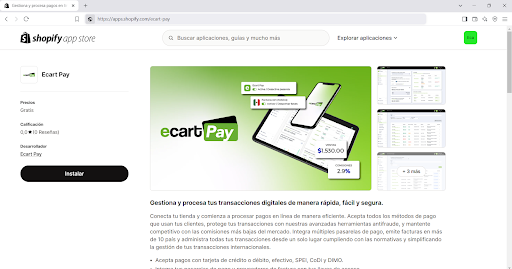
Image 1. Ecart Pay on Shopify
- After selecting the store where you want to install the application, a window will appear displaying the required permissions for the app to function properly. Click "Install" to proceed.
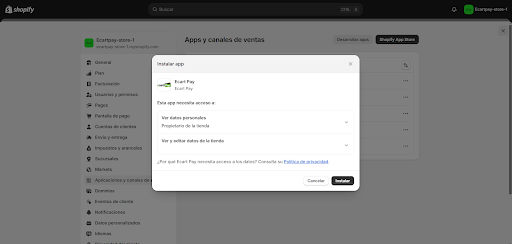
Image 2. Installing Ecart Pay
- Once the application is installed, you will be redirected to the welcome screen. This screen will display your store details for confirmation and notify you that you must have a verified account with Ecart Pay to process payments. After confirming your information, click "Start Setup" to begin linking your Shopify store with your Ecart Pay account.
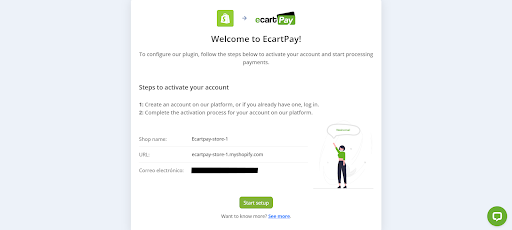
Image 3. Activating account
- After clicking "Start Setup", you will be redirected to the Ecart Pay login page, where you must either sign in to your existing account or create a new one.
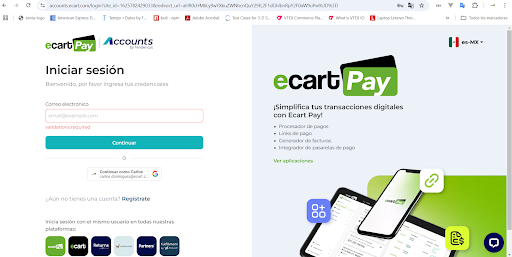
Image 4. Ecart Pay Login Page
- After logging into your Ecart Pay account, you will be taken to the integration setup page. Here, you will see a confirmation that your Ecart Pay session is active. You will also have the option to choose a different account if needed. Click "Continue" to link your active session with your Shopify store.
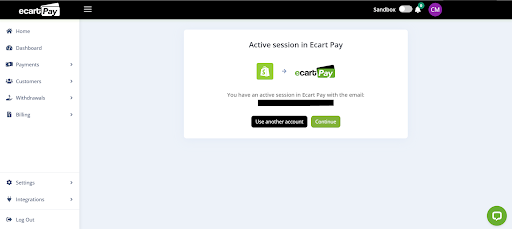
Image 5. Linking Ecart Pay and Shopify
- Next, you will be redirected to the app settings page within your Shopify store. Here, you can choose the payment methods you want to enable and decide whether to activate test transactions. Once you have configured your preferences, click "Activate" to complete the setup process.
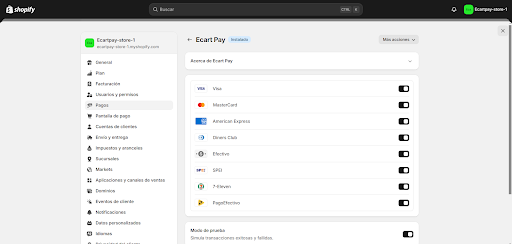
Image 6. Payment methods
- To verify that your Shopify store has been correctly configured, go to the "Manage" option in the "More Actions" section of the application.
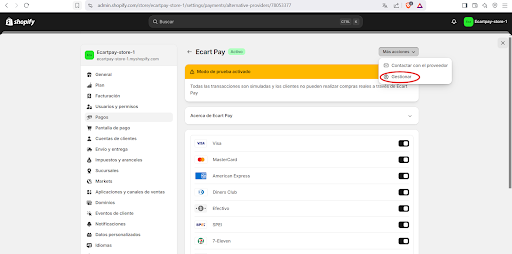
Image 7. Manage option
- You will then be redirected back to the Ecart Pay integration settings page, where you will see a confirmation that your installation was successful. At this point, you will have two new options: "Go to Shopify," which will take you back to your store, and "See My Integrated Stores," which will direct you to a section in Ecart Pay where you can see all your connected e-commerce platforms.
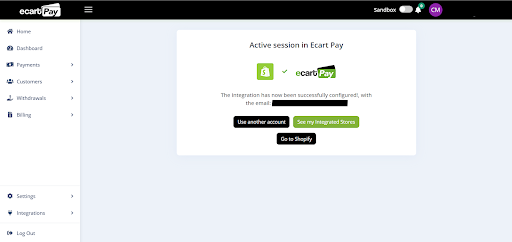
Image 8. Confirmation of Installation
- On the "Stores" page, you will see all your e-commerce platforms integrated with Ecart Pay. Locate the newly integrated Shopify store and enable the "Sandbox" mode to conduct test orders in your Shopify store using Ecart Pay.
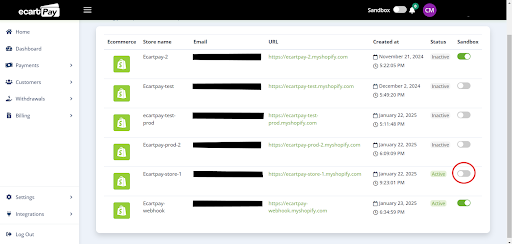
Image 9. E-commerce platforms integrated
- To place a test order, select a product from your Shopify store and proceed to checkout. You will see Ecart Pay listed as a payment method. Click "Pay Now" to continue.
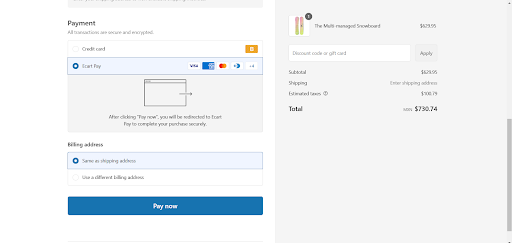
Image 10. Shopify Store Checkout
- After selecting "Pay Now," you will be redirected to the Ecart Pay checkout page, where you can enter your card details. Since this is a test transaction, it will be processed in the Sandbox environment. Use the following test card details:
| Card Number | Expiration Date | CVV |
|---|---|---|
| 4242 4242 4242 4242 | 12/27 | 424 |
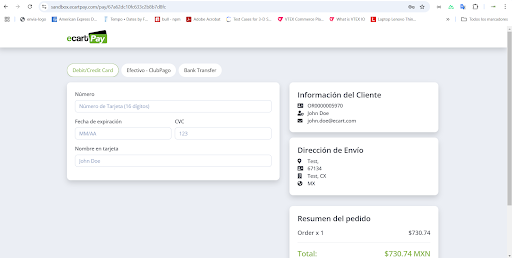
Image 11. Ecart Pay Checkout
- After completing the payment, you will be redirected to the order confirmation page in your Shopify store.
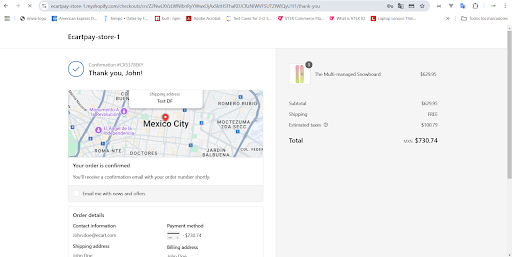
Image 12. Order Confirmation
- Once the payment is completed, go to the admin panel of your Shopify store and navigate to the "Orders" section. Here, you will see the order created along with the payment status.
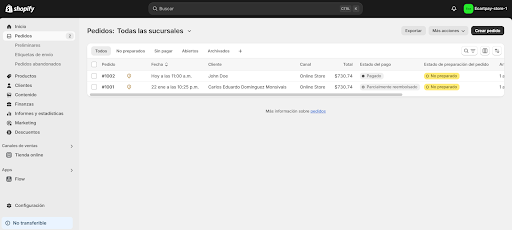
Image 13. Admin panel
- To issue a refund for your order, go to the order details page and select "Refund."
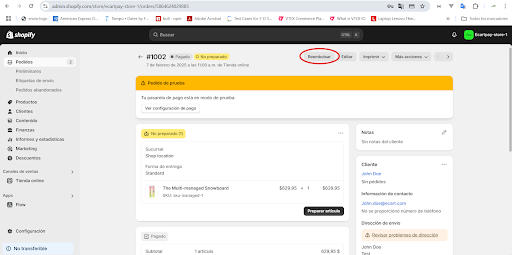
Image 14. Refund of an Order
- After clicking "Refund," you will be redirected to the refund settings page, where you must enter the refund amount. You can issue a full or partial refund and specify a reason for the refund.
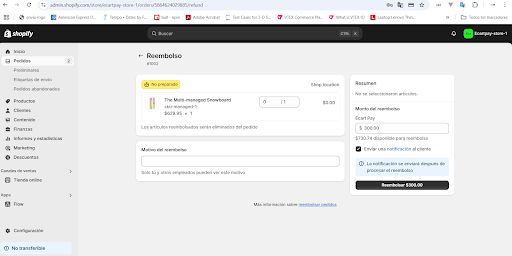
Image 15. Refund settings page
- After processing the refund, go back to the "Orders" section. If you issued a partial refund, the status will be updated to "Partially Refunded."
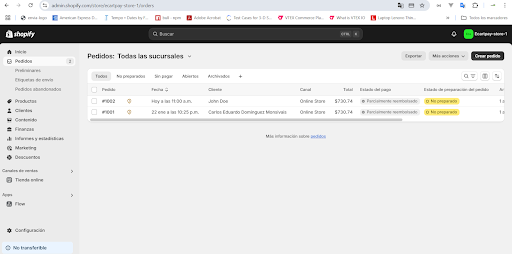
Image 16. Orders section with refund status updated
- To verify that your transaction was successfully created, go to the "Transactions" section in your Ecart Pay account. Since this order was processed in the Sandbox environment, switch your account environment to view test transactions.
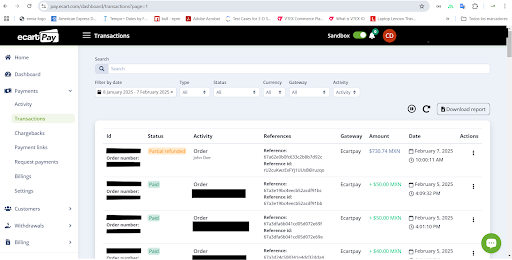
Image 17. Transactions section in Ecart Pay
By following these steps, you will successfully integrate Ecart Pay with your Shopify store, ensuring a smooth and secure payment process for your customers. This integration simplifies order management, provides flexible payment options, and enhances the overall shopping experience.